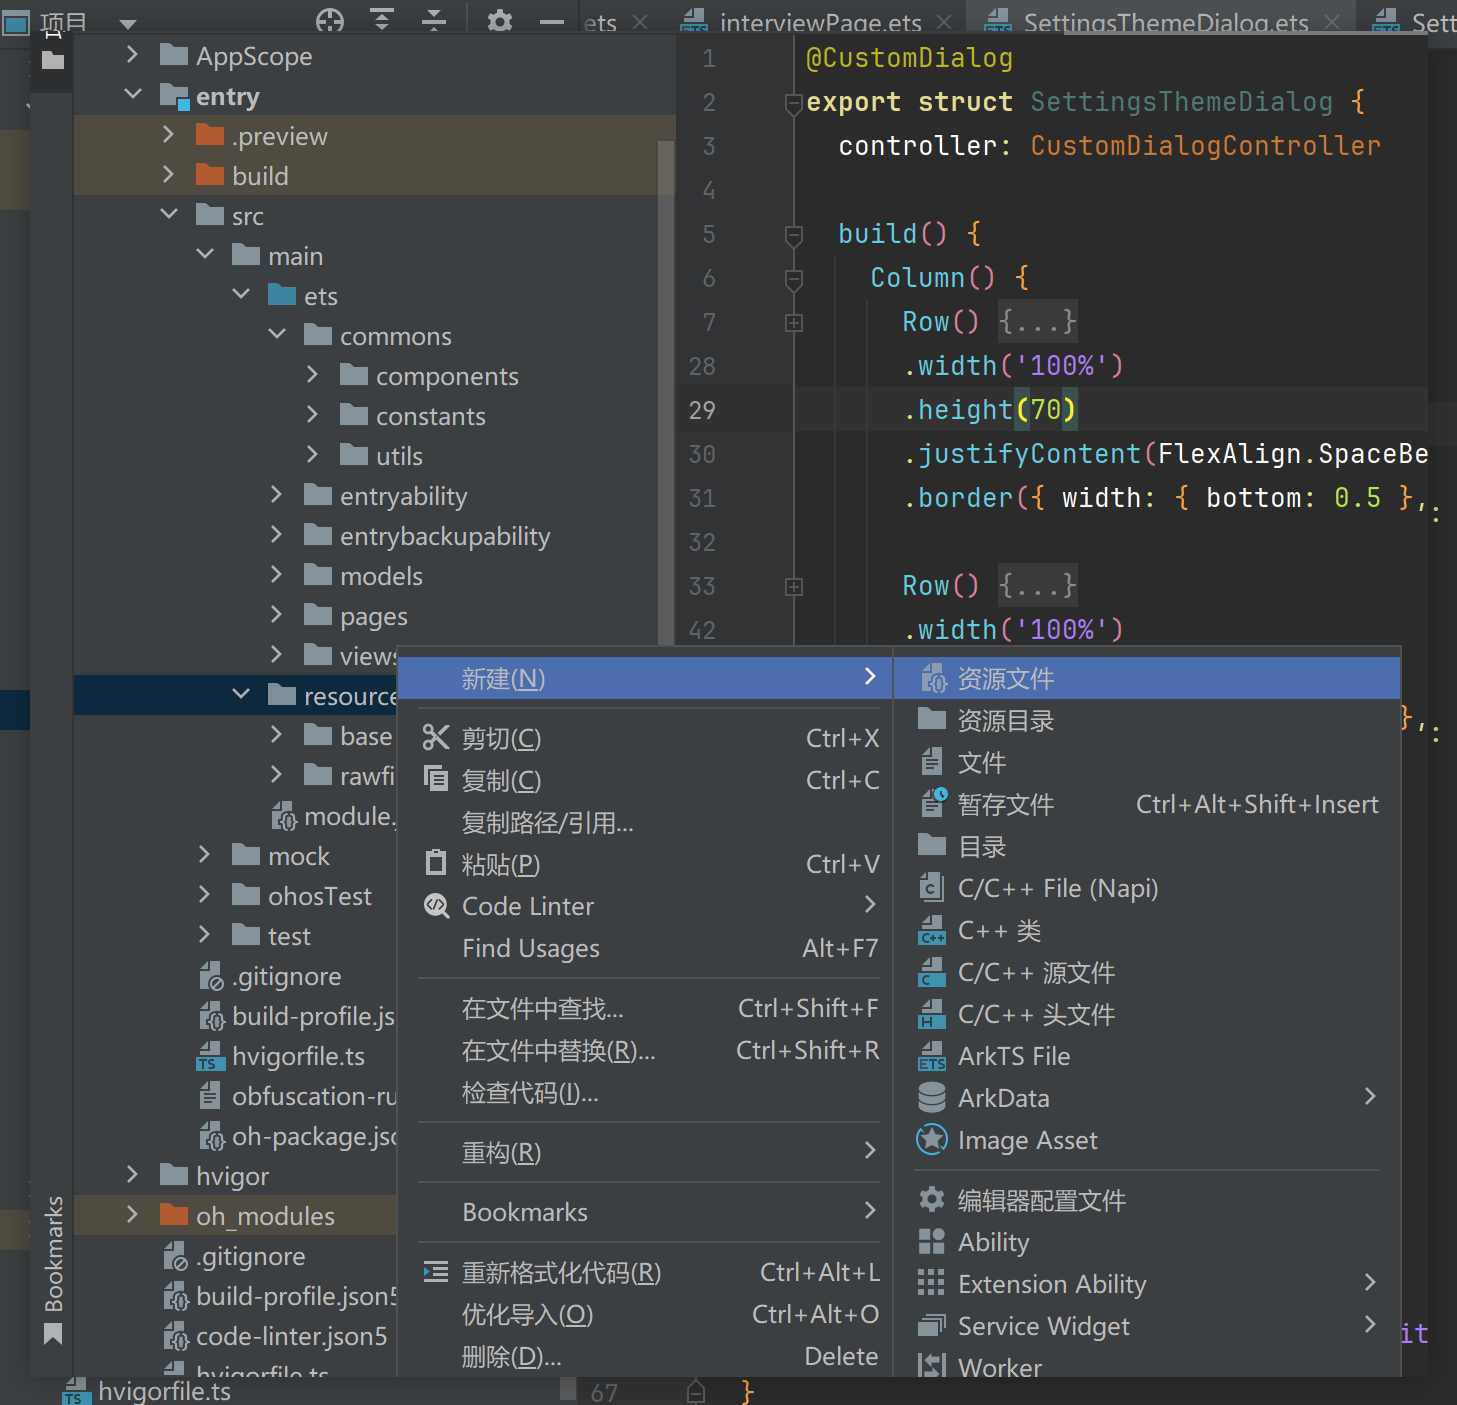
一、创建深色资源目录 + 文件
1.1 创建资源文件
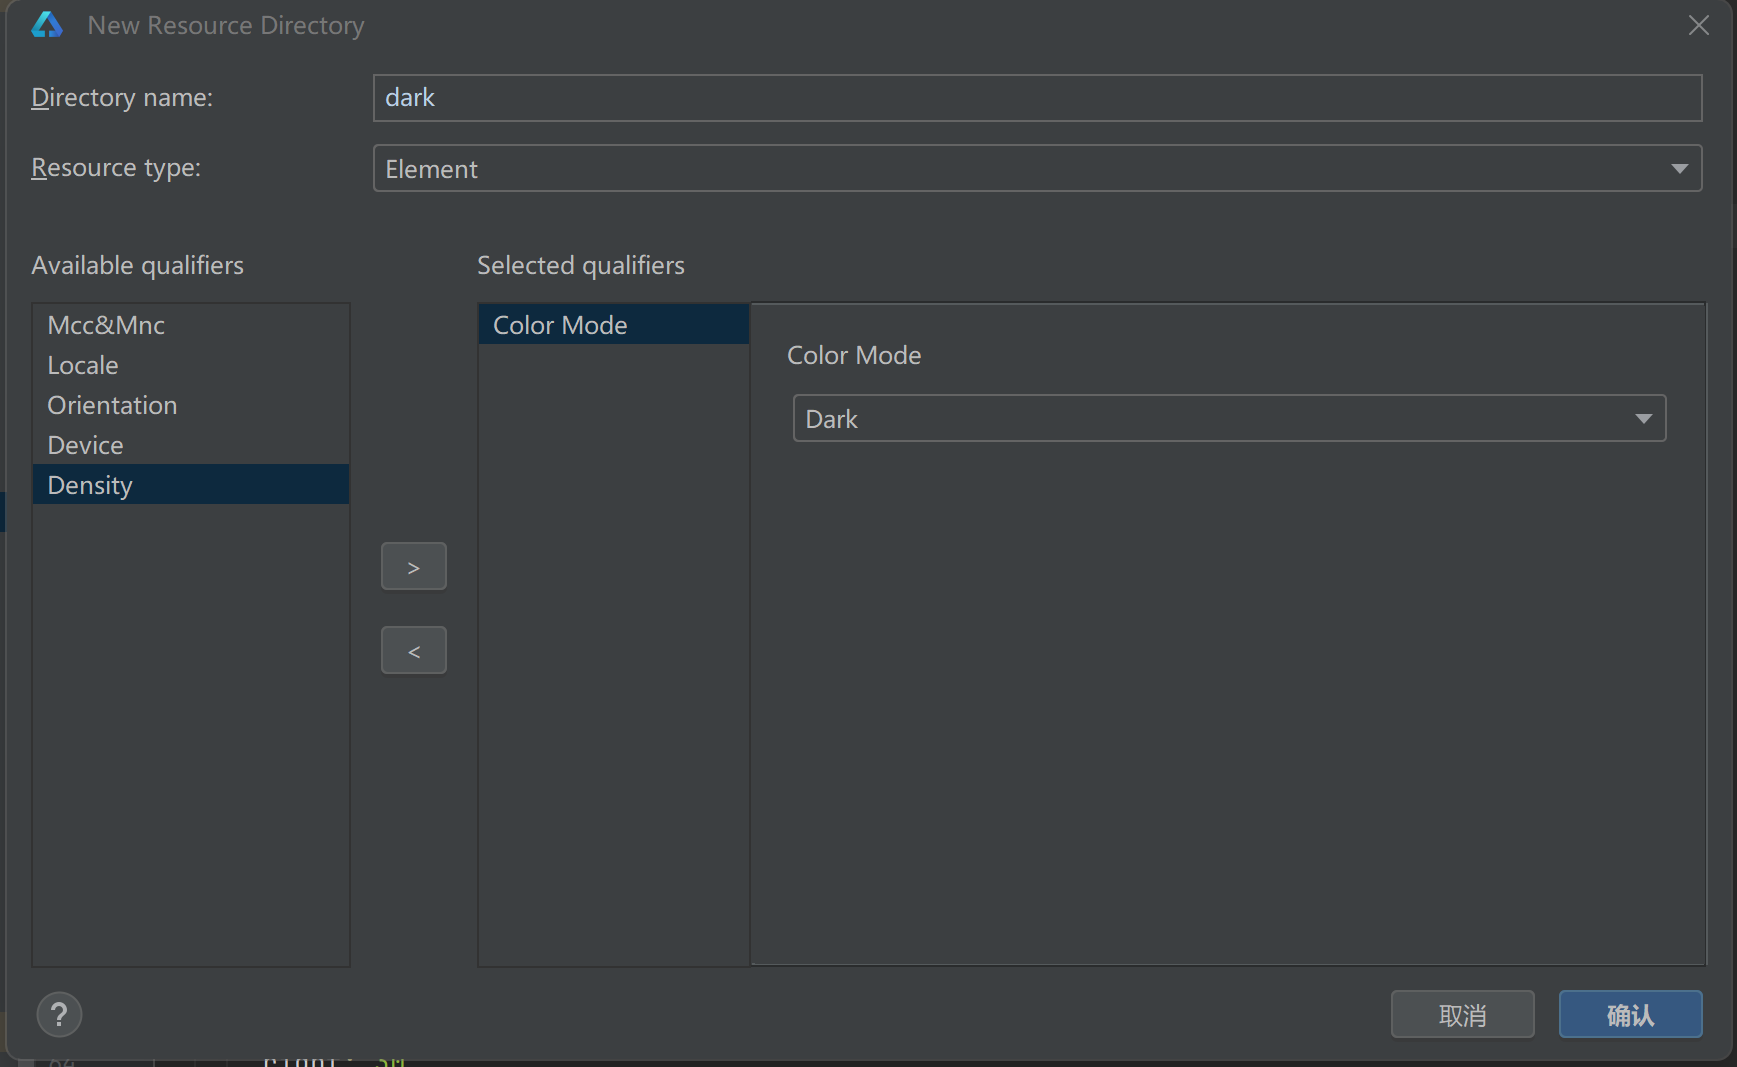
1.2 资源文件选择ColorMode类型
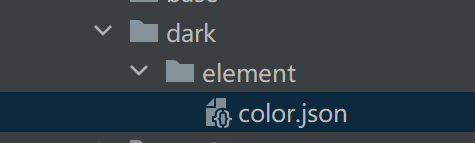
1.3 在文件下面创建color.json文件用来储存颜色资源
二、添加深色资源
深色模式资源
目标:根据默认的主题颜色,配置暗色主题的颜色资源
具体步骤:
- 添加暗黑模式下的演示资源, 默认是跟随系统可以测试
落地代码:
.亮色模式颜色资源代码
1
2
3
4
5
6
7
8
9
10
11
12
13
14
15
16
17
18
19
20
21
22
23
24
25
26
27
28
29
30
31
32
33
34
35
36
37
38
39
40
41
42
43
44
45
46
47
48
49
50
51
52
| {
"color": [
{
"name": "common_gray_01",
"value": "#979797"
},
{
"name": "common_gray_02",
"value": "#848484"
},
{
"name": "common_gray_03",
"value": "#666666"
},
{
"name": "common_gray_bg",
"value": "#f3f4f5"
},
{
"name": "common_gray_border",
"value": "#e8e7ee"
},
{
"name": "common_main_color",
"value": "#FA6D1D"
},
{
"name": "common_green",
"value": "#41B883"
},
{
"name": "common_blue",
"value": "#3266EE"
},
{
"name": "common_blue_bg",
"value": "#EDF2FF"
},
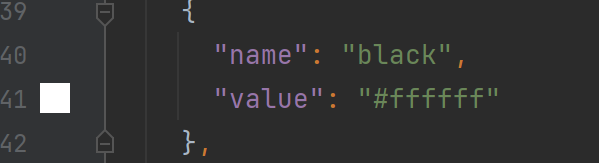
{
"name": "black",
"value": "#131313"
},
{
"name": "white",
"value": "#ffffff"
},
{
"name": "home_gray",
"value": "#EDECF2"
}
]
}
|
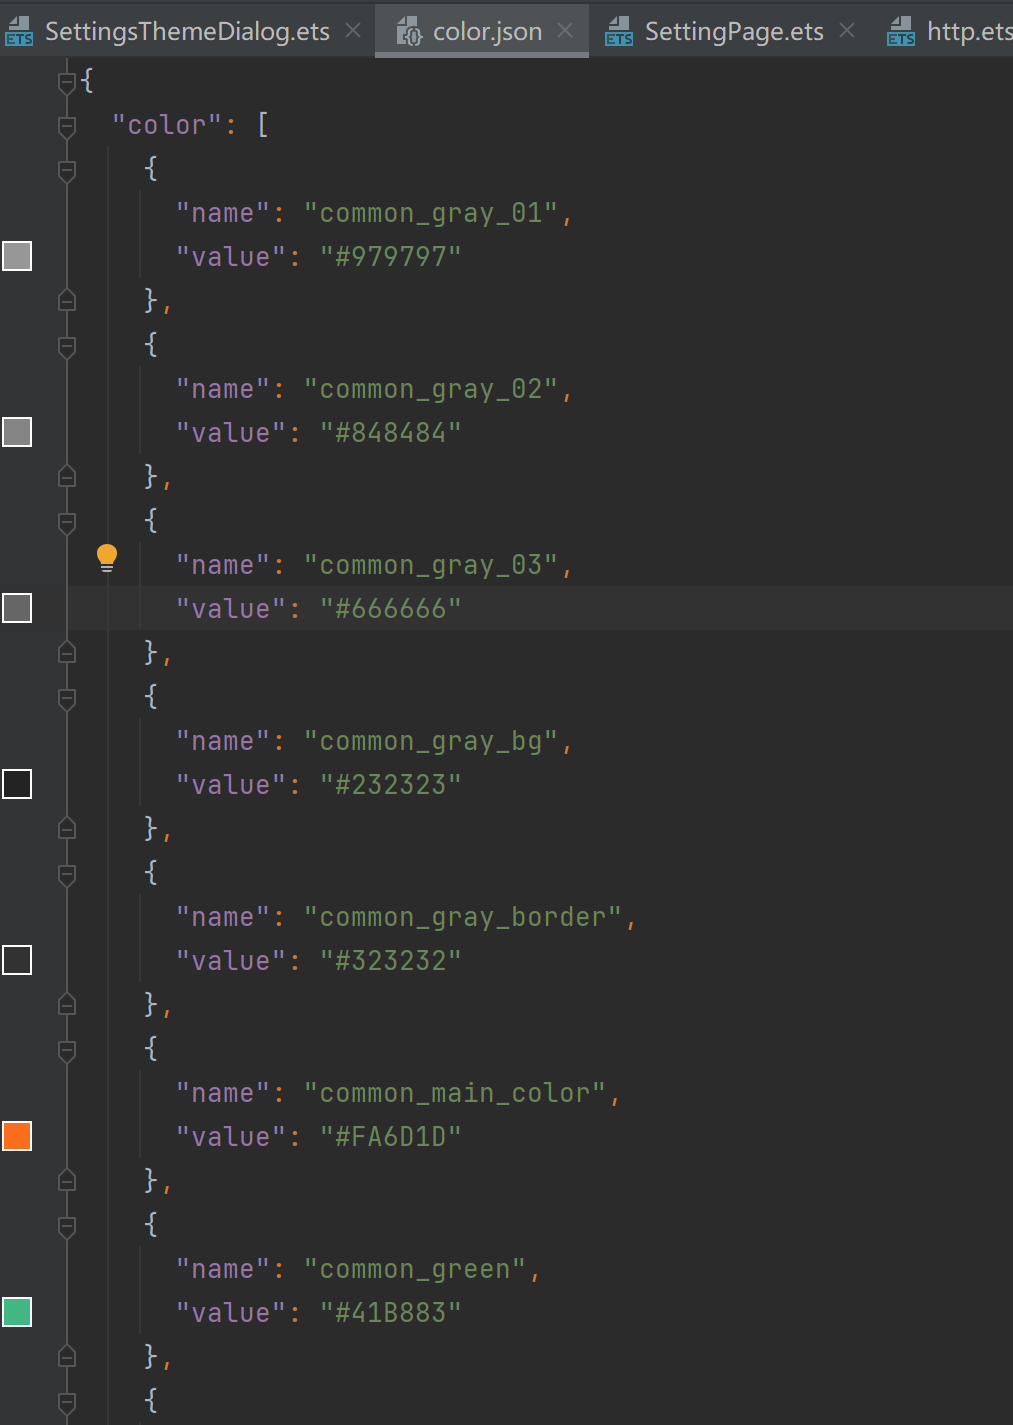
添加暗黑模式下的演示资源 resources/dark/element/color.json 添加以下代码
1
2
3
4
5
6
7
8
9
10
11
12
13
14
15
16
17
18
19
20
21
22
23
24
25
26
27
28
29
30
31
32
33
34
35
36
37
38
39
40
41
42
43
44
45
46
47
48
49
50
51
52
| {
"color": [
{
"name": "common_gray_01",
"value": "#979797"
},
{
"name": "common_gray_02",
"value": "#848484"
},
{
"name": "common_gray_03",
"value": "#666666"
},
{
"name": "common_gray_bg",
"value": "#232323"
},
{
"name": "common_gray_border",
"value": "#323232"
},
{
"name": "common_main_color",
"value": "#FA6D1D"
},
{
"name": "common_green",
"value": "#41B883"
},
{
"name": "common_blue",
"value": "#3266EE"
},
{
"name": "common_blue_bg",
"value": "#EDF2FF"
},
{
"name": "black",
"value": "#ffffff"
},
{
"name": "white",
"value": "#131313"
},
{
"name": "home_gray",
"value": "#b3b3cc"
}
]
}
|
对比分析:
暗黑模式下:白色
亮色模式下:黑色

ApplicationContext.setColorMode
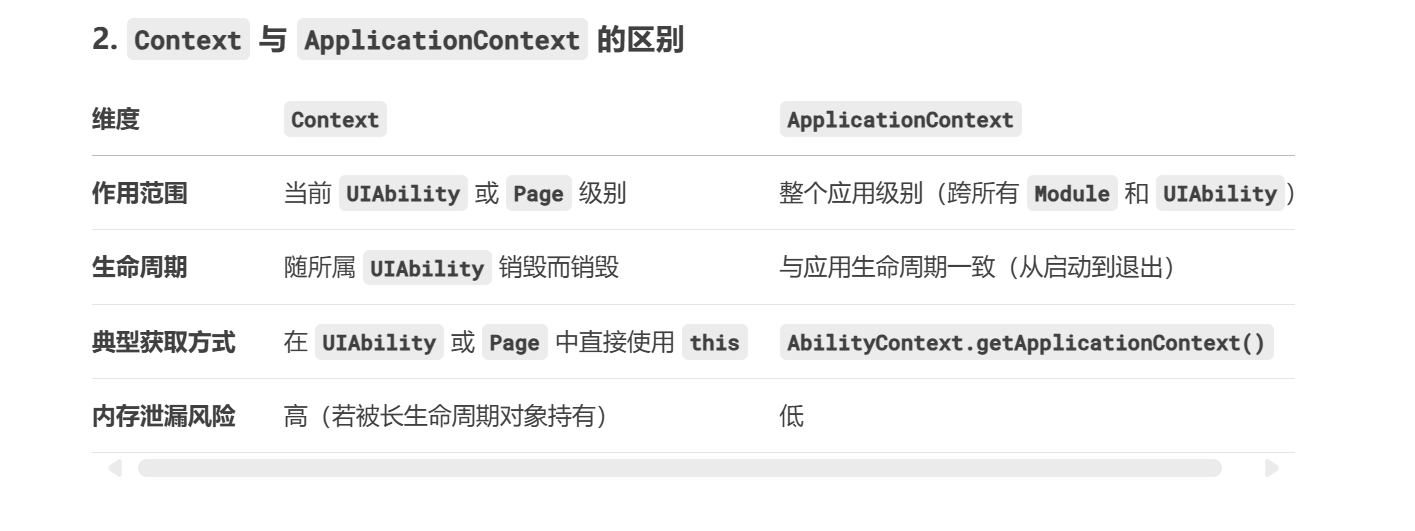
ApplicationContext与Context之间的区别:
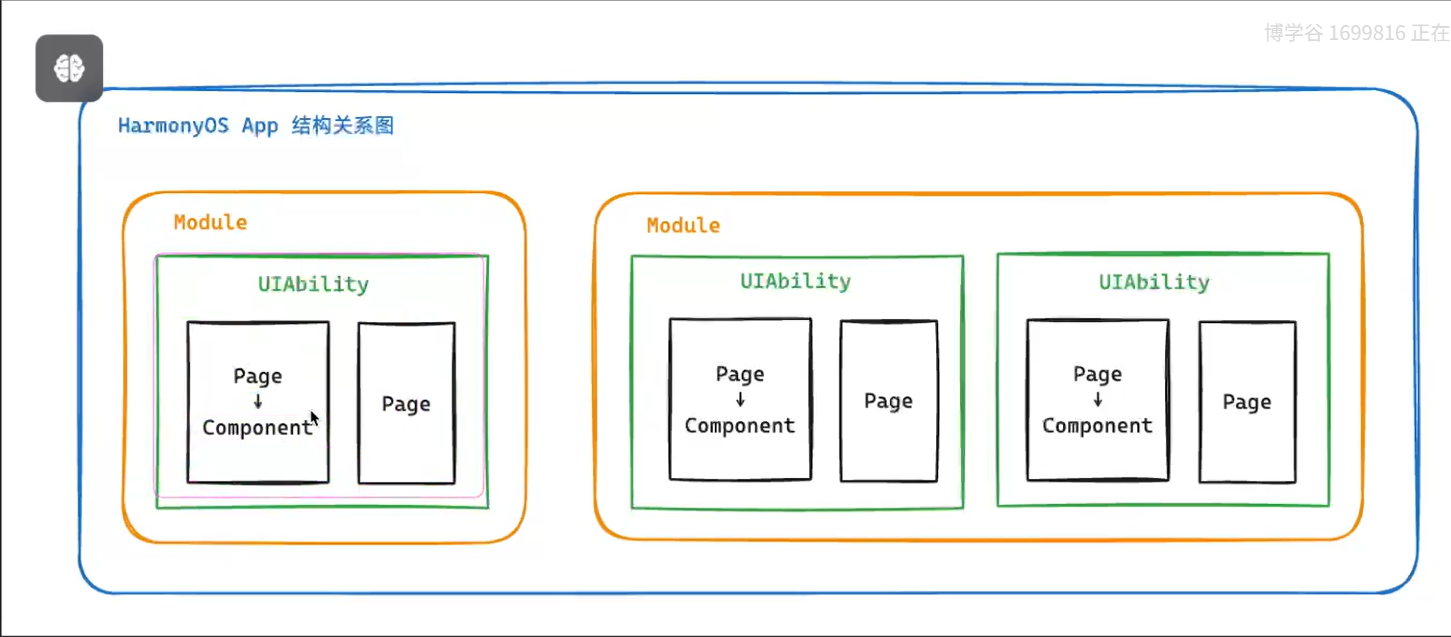
一个应用里面可能会有多个包 多个UIAbility模块
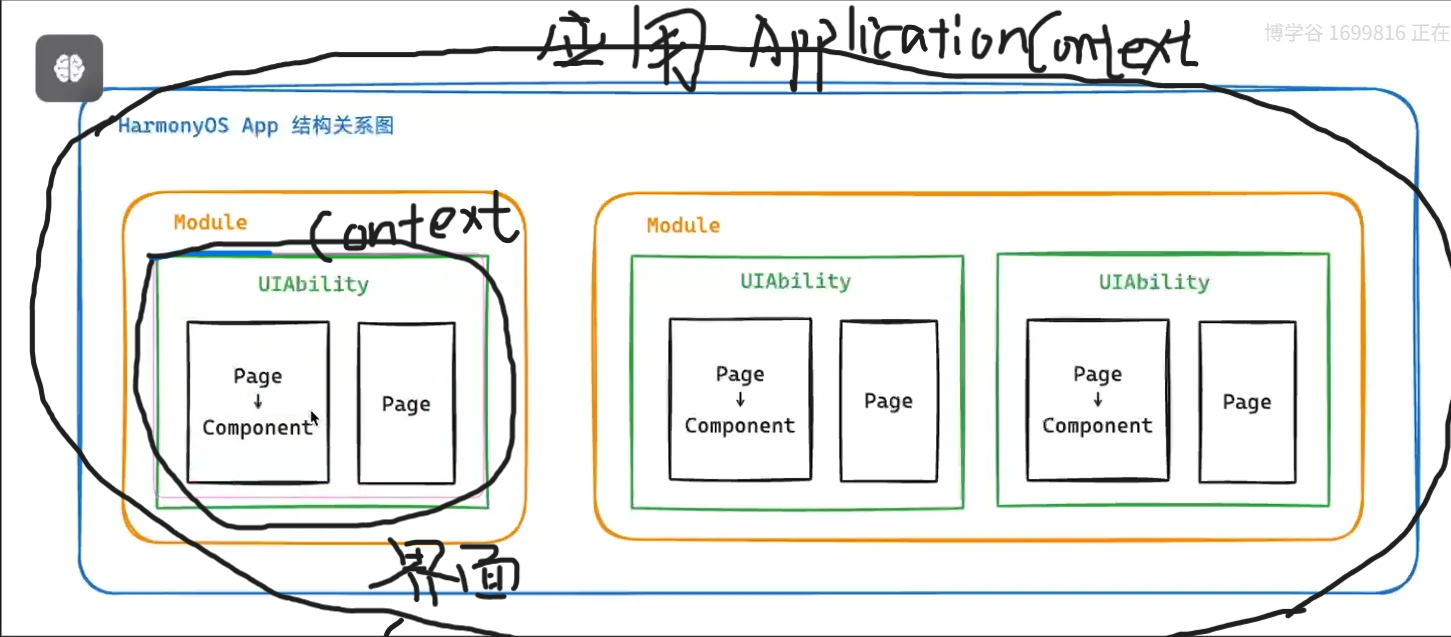
**Context** 属于 **UIAbility** 或 **Page** 层级,用于处理当前模块内的交互。**ApplicationContext** 属于 **Module** 之上的应用层级,用于跨模块通信和全局管理。
eg: 设置跟随模式
在UIAbility中的onCreate()里面设置全局颜色模式
1
2
3
4
5
6
7
8
| onCreate(want: Want, launchParam: AbilityConstant.LaunchParam): void {
//this.context.getApplicationContext().setColorMode(ConfigurationConstant.ColorMode.COLOR_MODE_NOT_SET);
//hilog.info(DOMAIN, 'testTag', '%{public}s', 'Ability onCreate');
// 获取上下文对象 this.context
AppStorage.setOrCreate('context', this.context) // 上下文对象进行存储
// 获取到应用级上下文 设置颜色模式 --默认是跟随模式
this.context.getApplicationContext().setColorMode(ConfigurationConstant.ColorMode.COLOR_MODE_NOT_SET)
}
|
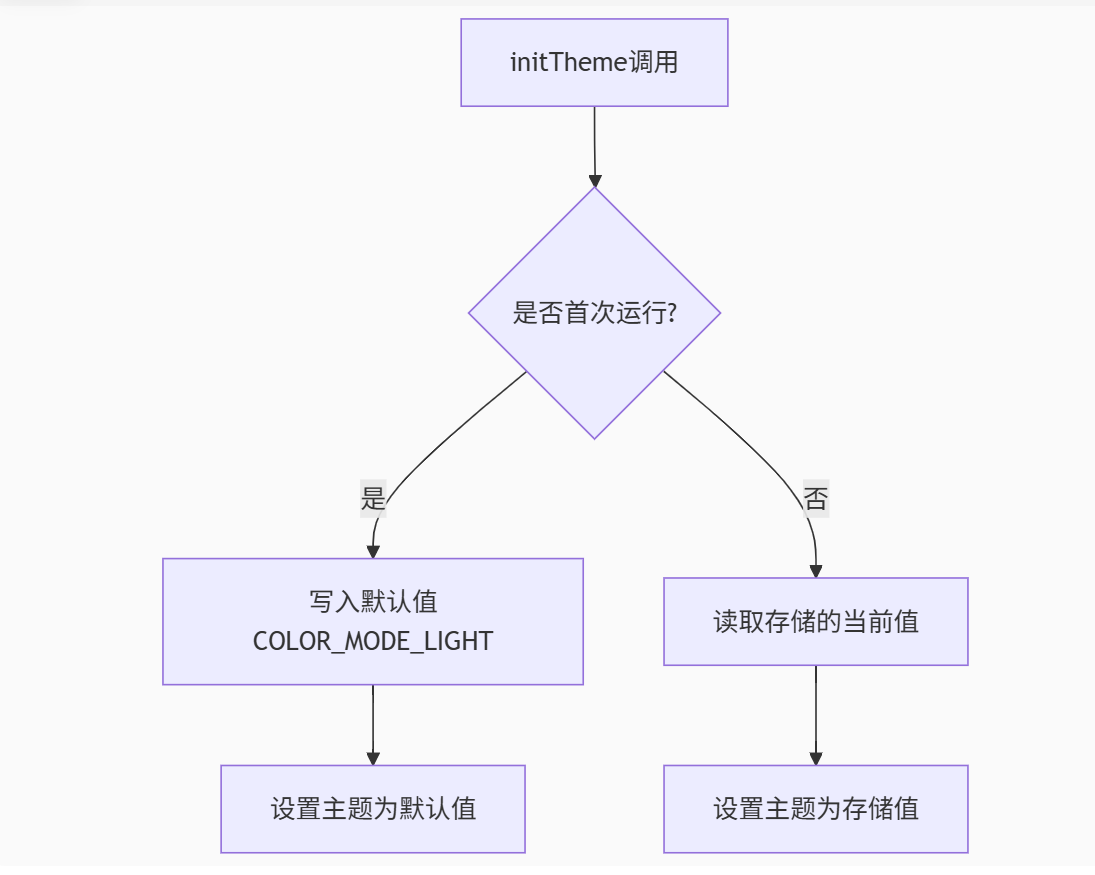
进入首页初始化主题色
1
2
3
4
5
6
7
8
9
| initTheme() {
// 持久化颜色主题,默认值亮色模式
PersistentStorage.persistProp<ConfigurationConstant.ColorMode>(ColorModeKey,
ConfigurationConstant.ColorMode.COLOR_MODE_LIGHT)
// 取出现在应用存储的颜色主题模式
const colorMode = AppStorage.get<ConfigurationConstant.ColorMode>(ColorModeKey)
// 设置应用颜色主题模式
this.setTheme(colorMode!)
}
|
主题是否每次被重置为亮色模式
- 否。
**persistProp** 的默认值仅在 首次初始化时生效,后续会优先读取持久化存储中的值(用户可能已修改过主题)。
- 逻辑流程:
Appstorage的setOrCreate与set之间的区别
1> setOrCreate主要是为了设置没有初始值的数据
2> set为了设置有初始值 -> 发生变化的数据
由于PersistentStorage.persistProp<ConfigurationConstant.ColorMode>(ColorModeKey,
ConfigurationConstant.ColorMode.COLOR_MODE_LIGHT)
所以必有初始值,没有必要使用setOrCreate
三、设置改变主题颜色工具类
1
2
3
4
5
6
7
8
9
10
11
12
13
14
15
16
17
18
19
20
21
22
23
24
25
26
27
28
29
30
31
32
33
34
35
36
37
38
39
40
| import { ConfigurationConstant, Context } from "@kit.AbilityKit";
export const ColorModeKey = 'hc-color-mode'
class Theme {
// 持久化颜色主题 默认是亮色模式
initTheme() {
// 持久化存储数据
PersistentStorage.persistProp<ConfigurationConstant.ColorMode>(ColorModeKey,
ConfigurationConstant.ColorMode.COLOR_MODE_LIGHT)
const colorMode = AppStorage.get<ConfigurationConstant.ColorMode>(ColorModeKey)
this.setTheme(colorMode!)
}
// 设置颜色模式 -- 深色颜色模式 高亮颜色模式 跟随颜色模式
setTheme(mode: ConfigurationConstant.ColorMode) {
// 设置主题颜色
AppStorage.set<ConfigurationConstant.ColorMode>(ColorModeKey, mode)
const ctx = AppStorage.get<Context>('context')
// ctx上下文对象可能为空 所以需要使用到可选链操作符
ctx?.getApplicationContext().setColorMode(mode);
}
// 跟随系统
notSet() {
this.setTheme(ConfigurationConstant.ColorMode.COLOR_MODE_NOT_SET)
}
// 暗色
setDark() {
this.setTheme(ConfigurationConstant.ColorMode.COLOR_MODE_DARK)
}
// 亮色
setLight() {
this.setTheme(ConfigurationConstant.ColorMode.COLOR_MODE_LIGHT)
}
}
export const theme = new Theme()
|
四、界面设计
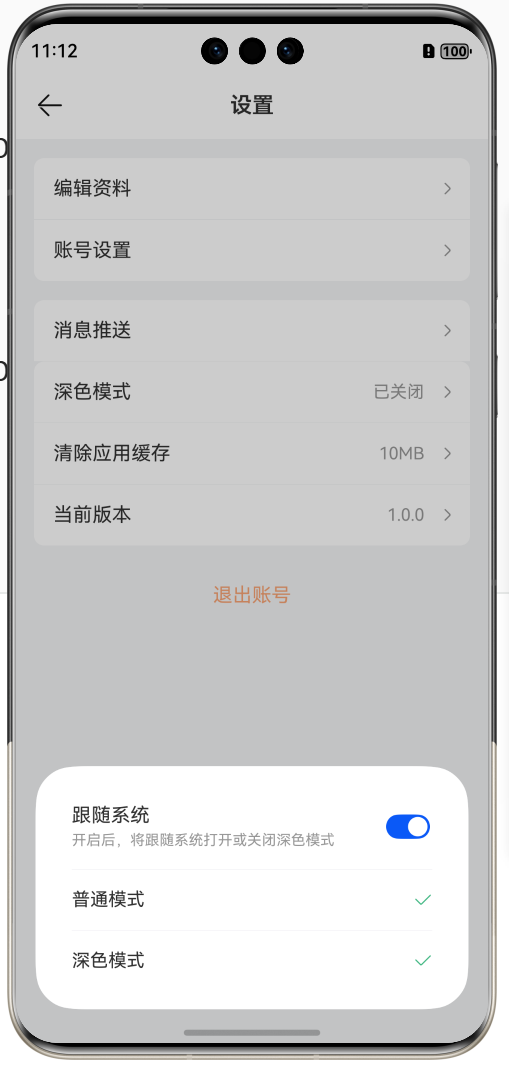
自定义弹窗工具设计
1
2
3
4
5
6
7
8
9
10
11
12
13
14
15
16
17
18
19
20
21
22
23
24
25
26
27
28
29
30
31
32
33
34
35
36
37
38
39
40
41
42
43
44
45
46
47
48
49
50
51
52
53
54
55
56
57
58
59
60
61
62
63
64
65
66
67
68
| @CustomDialog
export struct SettingsThemeDialog {
controller: CustomDialogController
build() {
Column() {
Row() {
Column({ space: 4 }) {
Text('跟随系统')
Text('开启后,将跟随系统打开或关闭深色模式')
.fontSize(12)
.fontColor($r('app.color.common_gray_01'))
}
.alignItems(HorizontalAlign.Start)
Toggle({
type: ToggleType.Switch,
isOn: true
})
.onChange((val) => {
if (val) {
// TODO 跟随系统
} else {
// TODO 默认亮色
}
})
}
.width('100%')
.height(70)
.justifyContent(FlexAlign.SpaceBetween)
.border({ width: { bottom: 0.5 }, color: $r('app.color.common_gray_border') })
Row() {
Text('普通模式')
.fontSize(15)
Blank()
Image($r('app.media.ic_public_ok'))
.width(16)
.aspectRatio(1)
.fillColor($r('app.color.common_green'))
}
.width('100%')
.height(50)
.border({ width: { bottom: 0.5 }, color: $r('app.color.common_gray_border') })
Row() {
Text('深色模式')
.fontSize(15)
Blank()
Image($r('app.media.ic_public_ok'))
.width(16)
.aspectRatio(1)
.fillColor($r('app.color.common_green'))
}
.width('100%')
.height(50)
}
.padding({
top: 15,
bottom: 15,
left: 30,
right: 30
})
.backgroundColor($r('app.color.white'))
}
}
|